
Make your own Tracking Harness
Background
A couple of years ago I decided I wasn’t satisfied with the way my preferred tracking harness fit one of my dogs. After trying every harness I owned (and a few borrowed ones) on her, I couldn’t find a single harness that fit her well. I weighed the option of ordering, blind, other harnesses in the hope they’d fit her well, but decided I was going to have to bite the bullet and make my own harness.
I wanted to make a harness that was comfortable, precisely adjustable, and accomodating of the various sizes and shapes of the dogs I track. The only real resource I found online was Craig Green’s multi-part article on Tracking Equipment, located at http://www.basset.net/index.php?page=tracking-equipment-part-three, which included photos of his dogs’ handmade harnesses.
This article and the photos got my brain working, and I set out to figure out the most accommodating dimensions for my dogs. I arrived at this sketch. In retrospect, I definitely could’ve gone smaller…I think this harness would probably accommodate a Leonberger. But it also accommodates a Belgian youngster.
Material
(my dimensions…yours may vary)
- 4 yards 2″ wide cotton webbing
- 4 yards 1.5″ wide velcro hook & loop
- 2″ slotted D-ring
You’ll also need:
- serger or heavy duty sewing machine
- skilled seamstress
Notes
I’m not a seamstress. I made rough guesses at seam allowances to arrive at the yardage needed, ordered my supplies, and gave my sketch to a friend who is a seamstress.
I cannot tell you how to sew this…you’ll need to provide a certain level of expertise yourself. Remember that you don’t want the hook velcro pointed towards your dog’s body, nor do you want lumpy seams on the inside of the harness.
Directions
- Cut the “waist” pieces of webbing leaving enough room for finishing ends.
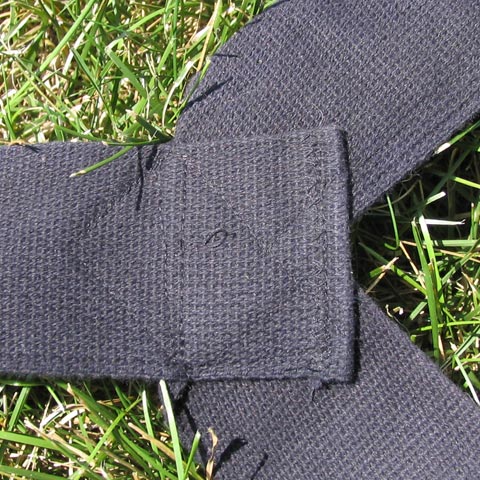
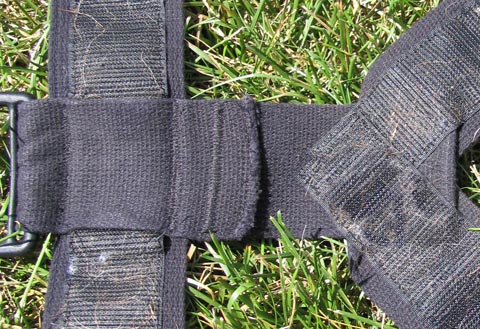
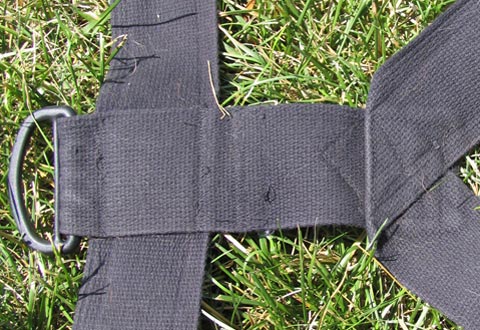
- Cut top chest strap. This should be one continuous piece of webbing that will be folded at the point, not two separate pieces. See Detail 1 and Detail 2.
- Cut bottom chest strap. Again, this is one continuous piece that is folded and stitched.
- Cut top and bottom webbing straps leaving room for finishing and attaching D-ring. For ease of attaching the chest strap to top, the finished top webbing piece should be 1/2″ longer than desired measurement. (The chest strap will be folded and sewn on top of this strap. Review Detail 3 and Detail 4 for clarification.)
- Sew webbing first, without velcro.
- Attach D-ring.
- Attach velcro to finished pieces, making sure the hook and loop are on facing edges. This is not an intuitive process…make sure you’ve got the velcro on the right side of the fabric!
- Do a final test fit. Join the chest straps first (even just a rough guess) and place over your dog’s head. Next join the waist pieces. You’ll need a few tries to figure out where the straps will join to best fit your dog.
Sources
I made my harness with Type II cotton webbing, velcro, and a plastic slotted D-ring purchased from Seattle Fabrics. Unfortunately, Seattle Fabrics no longer carries the black webbing so only natural is available. Another source is Jontay. My webbing from Seattle Fabrics seems to be equivalent to Jontay’s “heavy-weight” webbing but regular weight in fun colors should work okay, depending on your dog’s size and strength. My most recent harness is made from Jontay’s Pink Camo, which is heavy-weight and more than strong enough for any dog.
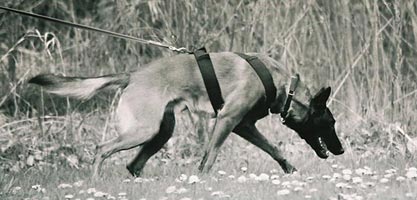
Finished Product
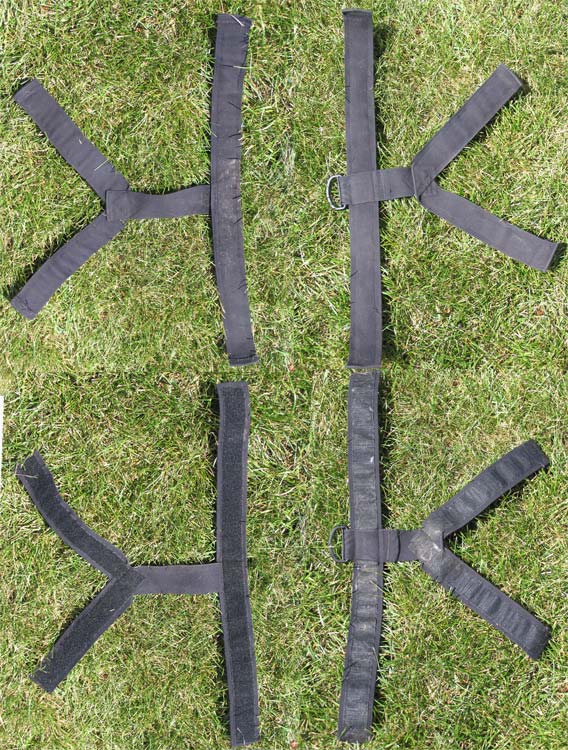
You can see the finished product in the picture at the top of the page, or compare the original Sketch vs. the Photo Montage (120k). As a word on strength…some people are concerned about the staying power of velcro. Because of the level of overlap, there is more than enough tensile strength in this harness to hold any dog. I’ve used this harness for flyball and even protection work with no problem.